Tuesday, September 24, 2013

Adaptation

I've pretty much finished up my pink project and am finally ready to share the progression.

It started with the remains of an old college installation project:

After a layer of mod podge and gesso:

A thin color wash:

Fabric paint and poetry:

 Rose petals and rendering:

Colored pencil rendering and more fabric paint:

Oil paint layer and more fabric paint:

Rings and things:

Storm clouds arrive:

Fill in rings:

 Dress shirt and vinyl layers:

Butterfly beads, and buttons:

And finally, words:
This, the completed project will be on display and available for sale at the Paint the Night Pink Art Exhibition later in October.

Tuesday, September 17, 2013

Yarn Storage Revamp Project Complete

My vision has finally come together with the completion of this project.  It was a rather labor-intensive project.  It was, however, ridiculously inexpensive and fairly simple to execute.  So here's a little DIY tutorial for any other frugal crafters out there...

Hanging Bucket Yarn Storage


What you'll need:
*buckets
*straight power saw
*power drill (with 1/4" bit)
*power sander (optional)
*1/4" eye bolts (with 2 hex nuts each)
*S hooks
*screw eyes with ceiling anchors
*1/4" bolts of various determined lengths (with hex nut)
*sharpie
*ruler/tape measure (I used both)
*screwdriver (to install anchors and screw eyes)
*wrench (to tighten hex nuts/bolts)

I used ten 5-gallon pickle buckets and five 3-gallon pickle buckets that I got from my younger brother's fast food restaurant.  They're super easy to get completely free because they are considered trash once empty.

Step 1: Rinse the buckets.  I rinsed mine by hosing them down in my parents yard.  I only did a quick rinse to start because I knew I'd be losing several inches of bucket (why clean it if you're not gonna use it!?)

Step 2: Mark the saw line.  I used my fabric tape measure to wrap a straight line around the bucket just below the handle hinge and marked it with my sharpie.

Step 3:  Saw the top of the buck off along the drawn line.  This step was extremely difficult for me.  I was sitting on an extra upturned bucket in my parents' driveway for a solid portion of the day.  I had to make a starter cut with a utility knife at 1 of the 2 hinge points to put my saw blade through.  Once I got going, I fell into a stride but I can honestly say that not even 1 of my cut buckets has a nice straight cut.  At least I can say I did it all by myself.  My dad held the first bucket while I sawed but he was fixing his gutters and didn't really have time to help.  This and the next step I would definitely recommend doing outside.

Step 4: (Optional)  Sand the edges.  I wasn't going to but my dad offer his power sander so I straightened up the edges a bit.

Step 5:  Clean the buckets.  After taking off about 4 inches of bucket off the top of all 15 buckets, I felt this was a good time to clean the pickle stink off the buckets.  I hate pickles so it was nice to scrub the gross smell away.  I used my Norwex cleaning paste to scour the insides and outsides of every single bucket.  It took away most of the smell and all the stickers from the outside of the buckets.  My dad says bleach will take the stink out of them but I don't use chemicals in my home and I wouldn't want the bleach to affect my fibers.  I'd say if you're comfortable using it to clean your house, you could use it to clean the buckets.  The smell is NOT permanent; you CAN make it go away :D  I let my buckets dry in the sun.  When I got them home I wiped them down with an enviro cloth and sprayed them a few times with odor eliminator and now they smell fine.

Step 6: Arrange buckets into desired pattern.  I chose this layout from a handful of drawings I did because it seemed like it would best suit my needs.  I arranged them upright on my living room floor so I could accurately measure where the joins needed to be.

Step 7:  Take measurements.  You may want to do some of this ahead of time if you're working with limited space like I was.  I measured the space I wanted to put it and determined that I had a little over 50" to work with.  My 5-gallon buckets measured 11" in diameter so I decided to make the widest point of my storage unit 5 buckets wide (55").  I already knew I wanted the entire unit to hang from at least 2 buckets so my design fell into place pretty quickly after that.  While the buckets were laid out in the desired arrangement, I measured how far apart my 2 hangers would be (also the points for the lower hangers) and marked all the points of intersection for the buckets plus the hanger points.  I took measurements of the buckets themselves to determine what length bolts to get.  At the top, 2 buckets together measured 1/4" so I got 1/2" long bolts.  At the bottom, the buckets were 1/2" apart so I got 1" long bolts and used a spacer (cut to length from a rubber hose).  I used the join markings on the top of the bucket to mark the holes on the side with a ruler.  The back join was 1" from the bottom of the bucket and the front join was 7 1/2".  The smaller buckets had different measurements so I used different size hardware.

Step 8:  Get hardware.  I got most of my hardware from Macs because it is very reasonably priced.  I made a list of exactly what I needed beforehand by taking all the measurements but I still ended up making 4 different trips to the hardware store just for this project.

Step 9:  Drill join holes in sides of buckets.  I used a flat board as a drop cloth of sorts for the plastic shavings that fell off in this step.   I made sure to drill ALL the necessary holes at this point.  For the larger buckets, this included all 30 join points, the 4 top holes for hanging hardware. and the 4 lower holes for additional lower hanging buckets.  The smaller buckets had 14 join points and 4 top holes for hanging

Step 10:  Attach buckets together.  I added one bucket at a time joining them first at the back to install the spacer, and then at the front with the shorter bolts.  I intentionally built my unit in 2 halves to that the 1 intersection point between the 2 could be added after both pieces were installed.  I added bolt eyes to the top points.
2 halves standing next to each other awaiting installation

Step 11:  Install hanging hardware.  Using the measurements I'd taken to determine where the hangers would be, I plotted points on the ceiling at 1" and 7 1/2" from the wall.  I used heavy duty ceiling anchors and installed the screw eyes, and then added S hooks.

in the middle of installing the lower bolt eyes

Step 12:  Install unit.  I hung up one piece at a time from the S hooks installing the last join bolts afterwards.  I also added the lower bolt eyes once the unit was on the wall.  From those I hung 2 sets of S hooks (necessary because of the bucket size difference) and installed the smaller lower unit.

Installation Complete!

Adjust any hardware necessary and stock with yarn!


I apologize for not taking any other progress shots of this project but the portions of it that took place at my parents house were all gritty and outdoors so it wasn't very conducive to taking snapshots.  And really, there wasn't much to see through most of the project.

Remember that one blog that inspired me: 


Thanks YarnBombLove for inspiring my crafty yarn storage revamp!


****Altogether, this project cost me less that $10!!!!!

Thursday, September 12, 2013

Food-making marathon

So I went on a food making rampage Tuesday and today...

To start I made garlic and chive buttery mashed potatoes.

Then I roasted some tomatoes using this recipe: Oven Roasted Tomatoes.
my tomatoes pre-roasting...

and post roast!
I also roasted a red pepper and made a simple hummus recipe (sans the citrus) using this recipe: Roasted Red Pepper Hummus

 Then I grilled some veggies and chicken out on my deck.  I used a balsamic vinaigrette dressing as marinade for both and some rosemary.
my chicken and veg pre-grill
I used the last of my zucchini to make something very much like this recipe: Zucchini parmesan crisps.  I just used my Chuck Wagon fish and chicken breading instead of bread crumbs.  They were so easy and so damn delicious I didn't take any pics cuz I ate them straight off the pan!

Between Sky and I we finished the grilled veggies and the zucchini chips, but the leftover chicken I used in tonight's dinner: pasta bake.  I pureed the roasted tomatoes into a sauce for the bake.  I combined the sauce, the chicken, some fresh green beans and alfredo sauce and poured it over cooked tri-color rotini pasta in a pan.  Then, I topped the whole thing with parmesan and mozzerella and baked it until it was crispy around the edges and the sauce was bubbling.

This afternoon I made a batch of Apple Banana Cupcakes.  I think they're a little more like muffins but they're tasty, so who cares!


I also made a double batch of Banana Overload Oatmeal Cookies but without the nuts (since I didn't have any) so I iced some of them.  They're tasty either way:

Tuesday, September 10, 2013

Off again but busy as usual.

Well well, I finished up my vacation last week and worked then 5 days in a row over the weekend.  After work each day I was primarily on the hunt for a new job.  Today's my day off and I had 2 interviews already.  I'm not sure how I feel about either but I've got a followup with one of them on Thursday.  I've been thinking and worrying a lot lately about my financial situation and I feel like I'm finally making the right decision that will help ease the stress.
I had a profound private message conversation on Facebook last night with my best friend.  We haven't talked in ages because our lives are so distant and different now.  I know that she and I will both benefit strongly if we make an effort to speak more often.  Hers and mine is a one-of-a-kind friendship that spans distance and time.  I have always felt I could tell her anything.  I miss her dreadfully and I hope we'll talk again soon...

Anyways, now that Sky and I are back home for the day, she's napping and I have somethings I'd like to accomplish:
I've got lots of fresh produce from my parents' and grandparents' gardens that needs to be made more delicious.  I've got green beans, tomatoes and zucchini plus a red bell pepper and some bananas in the freezer too.  I've got mushrooms that'll turn soon if I don't saute them up and some potatoes that could use cooking too.  I'd like to cook up a few base meals to have for the upcoming week.  Our grocery budget is extremely tight this week so I'd like to limit the list of things I have to get before payday.  So, I better get cooking soon.
Another project, I've been, of course, consistently moving forward with my Pink Project for the Paint the night Pink Exhibition.  That reminds me, I need to email the director...  I've got some great progress shots so far though as I've been taking pics between the various layers I've added to the board.  It's starting to have some very interesting and beautiful things happen.  I decided pretty early on that despite actually taking progress shots, I didn't want to share them until the project is complete.  So, when it's done, I'll have a play-by-play progression, a story of what brought me to the finish.
Aside from those I've got some general housework and other things here and there to do so I better get moving while the young one sleeps.

Tuesday, September 3, 2013

Check and Check

I finished a couple items from the to-do list.

The first, Aaron's tattoo design:
I think he's going to take it down to his favorite artist sometime very soon to get it done.


The second, my family picture wall:
It's a good start I'd say.  I got the mirror shelf from my parents the other day and the wall shelf from DJ's today.  I have a few frames I'd like to get pictures for so there's a few holes for now.  I'm glad I've got what I've got up for now.


Another little guy:
I got another little shelf from my folks that works perfectly for temporary spice storage until I get a proper rack.  I love having this counter free now that the microwave is on a stand.


I spent most of Saturday working on 2 projects.  The first: the milk crate bench seat.  I spray primed the crates and have been waiting for them to cure properly to connect them (with zip ties).  I still need to finish the cushion.

Second: hand-stitching my necktie rug, a project that's been in progress for years.  I'm not sure why I decided to bust it out this weekend but I've made some progress and will eventually post pictures.

I spent most of Sunday at my parents house working on my buckets for the yarn revamp.  I need to get hardware tomorrow, drill the buckets and attach everything together.

I've also been working intermittently on my pink project.


Update complete.

Small Table Facelift

I just finished up a sort of little, sort of time consuming project that weaseled it's way onto the to-do list for my extended weekend.  My mom and dad's neighbors had this table on rummage but wouldn't take a penny from them, just told them to give it to me.  So I made this drab little table with tons of potential a sweet facelift.

Before:


And After!!!


Friday, August 30, 2013

Check #3 off my to-do list...

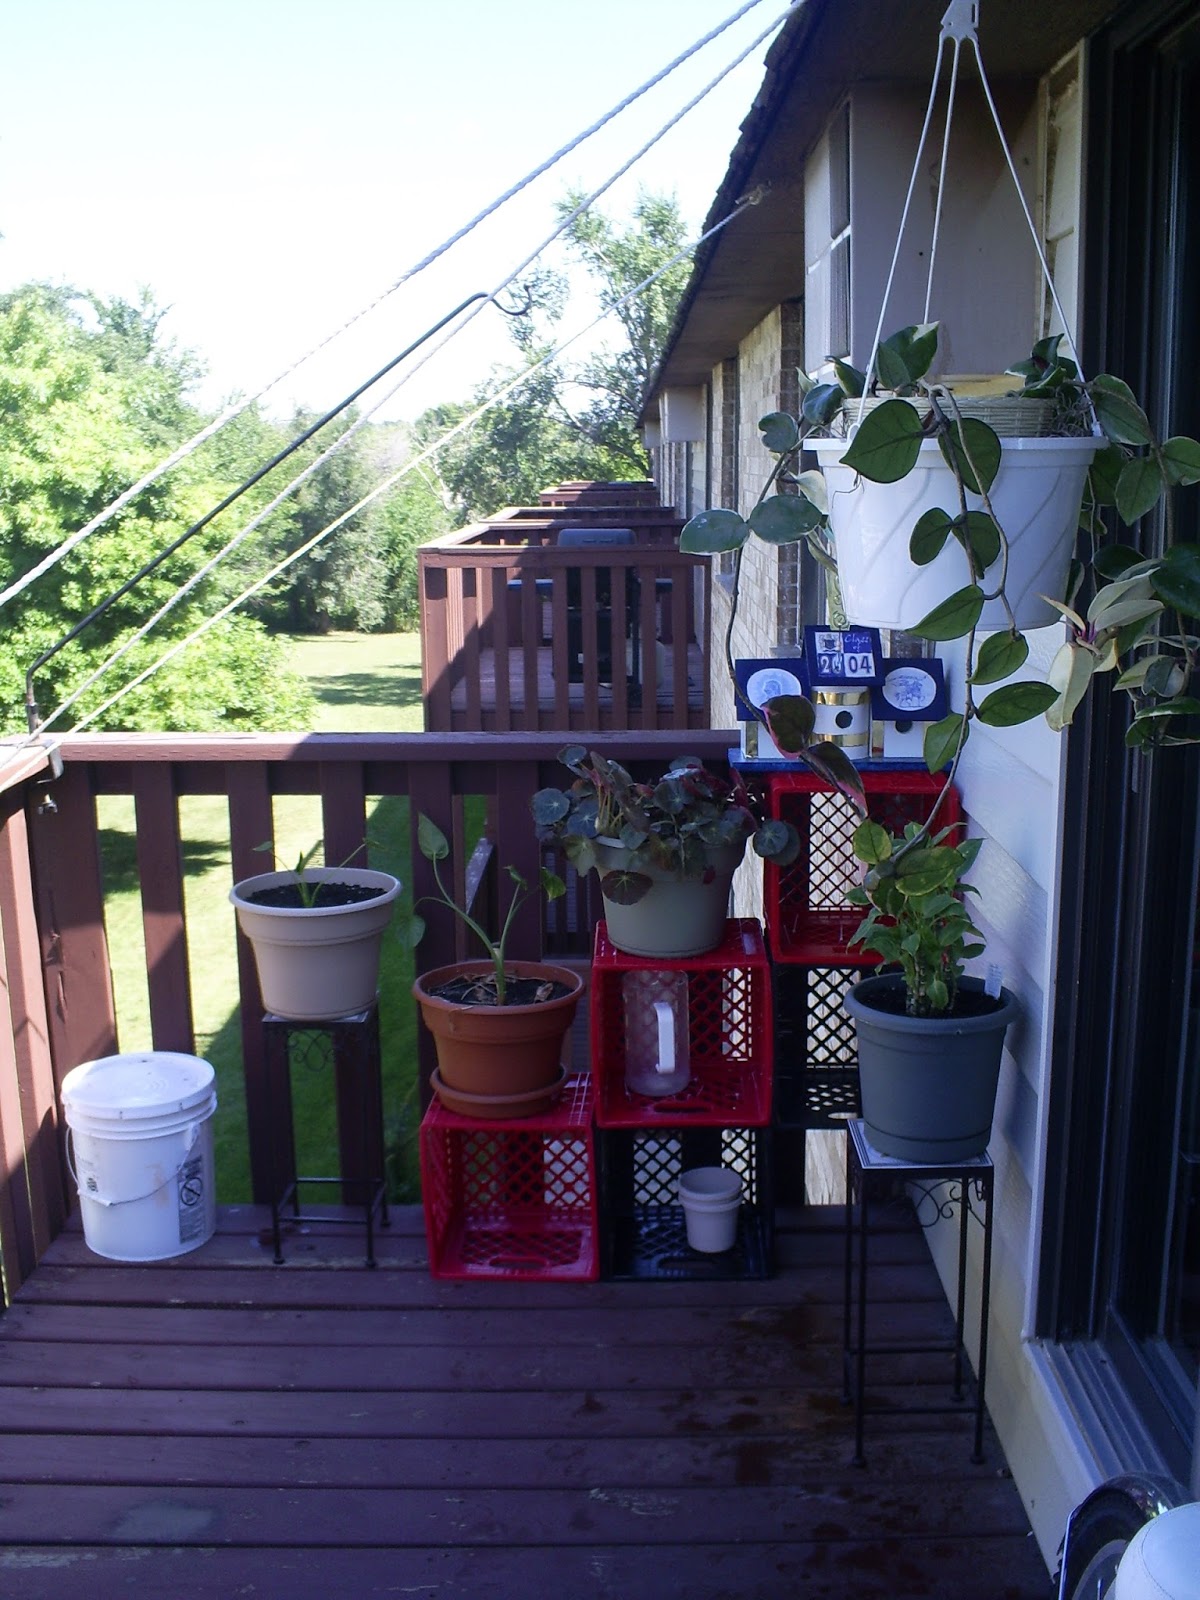
Our trip to Ace was extremely fruitful in terms of my weekend creative to-do list.  I got some screw eyes for the yarn revamp though I still need some bolt eyes and short bolts with nuts.  I also got zip ties for the 2 milk crate projects.   I had thought about bolting them together for a more permanent hold and maybe I will in the future.  But for now, zip ties will definitely do the trick.  I was able to get the plastic spray primer for the milk crate bench seat (on sale!).  I got a couple other random items off the dollar tables.  As aforesaid, the trip was very fruitful since we hit the grocery store after that.  Sky absolutely had to help me with the milk crate plant stand project I decided to start after lunch.  Once I put her down for her nap I was able to install it out on the deck. 
Here's a few shots of our afternoon endeavor:


dookie face


Plant stand installed*

My cute little deck with newly installed clothes lines...

and hand-me-down grill (Thanks Dad!)
*Once I got the stand in place and all the zip ties tightened, I snipped the ends.  I like the clean look.  It's a little sparsely clad right now but I'd say the project was a success.  Next spring I'll be planting herbs and other little whatnots for use in the kitchen and I'll have plenty of space to grow them on my sweet milk crate plant stand. 

I said "we'll see if this happens".....pfffffft, I squashed this project off my to-do list!

And so it begins...

It was all I could do to survive that horrible 8-day stretch at work and now I'm on vacation, HUZZAH!

I just re-read my to-do list and just made a mental shopping list for things I can get from Ace...we're going now :)

Saturday, August 24, 2013

Todotodotodotodotodo

I've been meaning to make a to-do list of projects I'd like to tackle during my 6 day vacation from work that starts Friday.  I have sort of a long complicated love/hate relationship with paper lists that I won't get into right so I've decided to make this one on my blog.


1.  Yarn Storage Revamp Project:  Right now, I store my massive yarn stock in old plastic milk crates I got back in my Wicker Park JJs days.  I'm looking to use those crates for other various projects so I need a new alternative.  After combing Pinterest for ideas that could work for my specific needs, I found one picture from a fellow blogger that inspired my revamp project:
Pic courtesy of YarnBombLove
The blog doesn't say how the storage is made so I've done some creative problem solving which will be economical and free!  My little brother manages a fast food restaurant and has access to plenty of 5 gallon pickle buckets.  I found that a good scrubbing with my Norwex cleaning paste takes the gross smell out of the buckets.  I plan on sawing the rim of each bucket off just below the hinge part that holds the handle so that it's flat outside all around.  Plus shortening the bucket brings it closer to the actual size of a yarn skein.  It looks to me like this blogger used something like large pieces of pvc pipe and brackets to mount them.  I like the idea of my tubes having bottoms so that I can potentially take them down and transport them upright.  I also think that I'm going to bolt the tubes into rows of 3 and will likely hang them from the ceiling rather than the wall.  I will probably hang them in some sort of pattern, calculated in some way.  I'd thank this blogger for the great inspiration and look forward to posting pics of my successful completion of my Yarn Storage Revamp Project.


2.  Milk Crate Bench Seat:  3 of my (17) milk crates have already been reserved for this project for Sky's room.  Another project that I cruised from Pinterest which will of course have all of my flare.  I'm not easily finding the source of this pic but the link to the pin is here.  My crates are a variety of colors so I want to prime them white for this project and possibly do a bright coordinating color to match with the rest of Sky's room.  I already have a piece of the pink gingham from the window treatments measured, cut and pinned to size for the cushion.  I either need to stuff it with white stuffing or cut a lining for it because the gingham has an embroidered flower pattern with holes.  I'll probably attach it with a ribbon or strips of the leftover gingham.  I'm going to bolt the 3 crates together.  I already have baskets to fit in the crates that match other basket storage in her room.  The successful completion of this project will mark a near completion point on Skylar's bedroom decor.  I've been excited about this project for quite awhile and I'm looking forward to it.


3.  Milk Crate Plant Stand:  This project may not happen over my vacation time, but a girl can dream can't she?  I saw someone posted a pic of a shelving unit made from 5 milk crates in a sort of W shape on their edges.  I'm not really set on any particular pattern yet, I just want an economical layout that will allow plant life to flourish on my little deck.  I have to complete my yarn storage revamp before the crates will be free for me to play around with layouts.  For the time being, I don't really feel the need to prime or spray paint the crates I'm using for the outdoor shelving but eventually I'd like to do them right.  I plan on just bolting them together into the best suited pattern and putting them to use right away.  We'll see if this happens...


4.  Family Picture wall:  I have a wall that I've designated for my family pictures in frames but I have yet to put any of them up because I need to get my wall shelves from DJ's place.  Once the wall shelves are up I'll have space for all the table top frames and can determine where to put the wall frames.  This is one of the last move-in details (though more seem to pop up daily) that I want to get taken care of.  This has to happen...

5.  Outdoor family name sign (for Aaron and Terri):  I plan on spending some time at my folks house while I'm sawing buckets for the yarn project so I figured it would be a great time to cut down a piece of wood for a project I meant to do months ago for my older brother's family.  I did one last Christmas for my little brother's family.  His just had our last name in simple font burned into a long narrow piece of walnut.  I had some nautical hooks I painted to look aged and my dad helped me attach them along the bottom of the sign.  I covered the rest of the board with sand and seashells from a family vacation years ago.  For the new design I plan on a more fancy or Gothic style font and a softer wood that will burn more easily.  I don't have hooks for this one but I still plan on using the same sand and seashells.  That will be extra special for them since it was the family trip with their beach side wedding proposal.  For the most part, I just want to get a jump start into this project.  Just having the surface in my possession will help me start moving forward with it.


6.  Sky hooks:  Another project to just get a jump on since I'll be sawing it up with my dad.  I want a cloud shaped piece of wood to mount the wooden letter SKY hooks that I got earlier this year on mega clearance at work.  I just want to paint the cloud and the letter hooks, mount the hooks on the cloud and then mount the cloud on an over-the-door hanger for Skylar's bedroom door.  I don't think the total project will take long once I have the cloud shape but it's not a major priority on the to do list.

And a few little 'tweeners:

*work on my Pink Project: I'm several layers deep already and looking forward to slowly building it up

*work on Aaron's pirate ship tattoo drawing: He wants to get the tat done in early September so I want to finish it up before the vaca is over.

*make baby hats:  it's never too early to get a jump start on my inventory for winter craft shows.  I've made a few hats over the past week or so up to the point of assembly.


That's it, I think.  Ready? Set?
Gooooooooooo!

Thursday, August 22, 2013

At least the daydream was pleasant

All day today I looked forward to my work day ending, picking up Sky, grabbing some groceries, and heading home for dinner, then after Sky's bedtime making some art.  Life had different plans for my evening when we pulled out into traffic from the grocery store parking lot and stalled out mid-intersection.  So a grumpy Sky and a sad Ash sat waiting for my dad to come, followed shortly by a tow.  I'm so frustrated right now.  We didn't get to come home and enjoy dinner.  Instead Sky ate a snacky little supper of cheese, crackers and fruit at my folks' house where we ended up (to get the van while my stupid car is in the shop).  We finally got home after Sky's bedtime so we rushed through our routine.  I ate nothing of note and have done nothing of note since I put her to bed.

Stupid car ruined my arting tonight.
And I was so excited to finally get the starter fixed...yesterday.  Ass.

Wednesday, August 21, 2013

Pinking...

So on Monday when I gathered my belongings from my parents house, I must confess that I purged some old artwork into the dumpster at my apartment.  It was a necessary purge that resulted in a springboard into my piece for the Paint the Night Pink Exhibition.

 The artwork included in the purge:
Peace Garden
Coffee Cup
Antler
Hell's Organ
The insides of Self Portrait Installation (the cupboard itself will be turned into an artwork storage closet, but it was too heavy to take out by myself the other day)
And finally, I took apart the Backend of Forever Installation saving only the cradled board it was assembled on.

That cradled board, sans the hounds tooth coat is now the surface for my Pink Project.  The coat left a really excellent pattern that I'm going to use as the background for a mixed media collage.  I put a coat of mod podge over the remnants of the fibers last night to keep them from fraying or flaking off when I paint and collage over the top.  Here's how it looks so far:
I'm not sure where it will end up but I've got some pretty good ideas...

Tuesday, August 20, 2013

Think Pink.

I've been working up a major sweat today moving some stuff from my folks house over to my apartment and unpacking.  I got a TON accomplished!
Projects included:
set up the microwave stand, utensil holder, and temporary spice storage, move up the towel bar in the bathroom, set up my desk area in the living room, unpack various art supplies and find appropriate storage for them all, hang some art, generally clean and organize pretty much everything.

And now I'm exhausted.

But I've been brainstorming ideas for the upcoming "Paint the Night Pink" Art Show.  Last year I showed new collage work related to my mom's experience with breast cancer.  I'm a little stumped so far, but I'm feeling more inspired after hanging these today.  I don't have much time, so I'd better get to it.

A Journey: Part 1
A Journey: Part 2

A Journey: Part 3

Sunday, August 18, 2013

Completed Window Treatment

I finished Skylar's bedroom curtains the other day and assembled them with the valance on the wall.  I'm very pleased with how they turned out:

Some progress shots:

Center curtain panels and completed valance
The purple panels are made from a set of old full size jersey bed sheets.  The jersey was a bit warped in places which required repinning and sewing to get rectangular panels.  I decided to line the center panel with the accent green tulle.  With the remaining tulle I lined the top of the 3 original panels.


The valance is made from 3 layers of foamboard taped together, wrapped in pink gingham and pinned in place.  It is a lightweight decorative accent to hide my curtain casings and the curtain rod.


With additional outer panels (later added 2 more purple panels)
 I had a scrap of the pink gingham left which made perfect side panels.  However, they still didn't have the total window coverage I'm looking for.  So I made 2 more jersey panels to fill them out a bit.

Close-up of valance corner: pearl head pins are decorative and functional!
My sewing isn't amazing but I think my curtains are great but I absolutely love my sweet awesome valance!  It was actually pretty easy to make and beautifully hides the sewing flaws in my curtains :D

Saturday, August 17, 2013

Fork it...

I'm having a proud mom moment...I know it's a little thing but Sky figured out how to use a fork:
Just stab it.

Then eat it.

I'm awesome!

But I still may use my hands now and then.